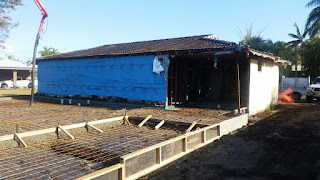
Demolish and start again, or use what is there?
Making the wrong decision here may cost you money or save you money.
This was a major decision that had to be made before we started this new renovation.
The existing house is a small brick veneer that was badly in need of repair caused by a leaking bathroom and some severe termite damage. Even though the external and internal wall frames were constructed using hardwood, the damage was significant however, it was not enough to warrant demolishing the entire structure.
The main termite damage was in the bathroom area where the constant water leak occurred. Also, some of the roof trusses were affected but the damage was minimal.
Our very first job was to lift the existing concrete slab along the back wall. Over the years, the house had dropped at the back corner by 50mm so with some excavation work, we rectified it.
We bought five 20 ton jacks, one for each hole but before we could do any lifting, we needed to bore 450mm diameter holes down to 3 meters deep.
We also had to excavate the rectangular area shown under the existing concrete footings and deep enough to fit the jack under. This was no easy feat as the ground is what we call glue pot, sticky black soil.
Once this was completed five times, we place the steel cages in position ready for concrete.
The round part of the cage extended down to 3 meters deep while the head was 800mm x 500mm x 500mm.
All five of these cages were held up into position by ropes tied to timber that was set across the holes. The concrete was then poured to cover the cages but low enough for our jacks.
We had set up our laser level inside of the house to monitor the levelling. Bit by bit we lifted each section a few millimetres at a time until we had reached our final height.
We then filled the holes with concrete and entombed the jacks. Job Done!
A 50mm fall from one end of the house to the other does not sound like much over 15 meters or so but if it is not rectified before commencing the new section, it can cause many problems during the project. Stabilizing the existing dwelling is paramount especially where the two sections join.
This type of work definitely needs the expertise of a qualified engineer. Our choice is Cornell Engineers. Check out their website for helpful information at www.cornellengineers.com.au
Stay tuned for part 3 where we have set up the new concrete footings and slab.
Cheers for now!


No comments:
Post a Comment
Note: only a member of this blog may post a comment.